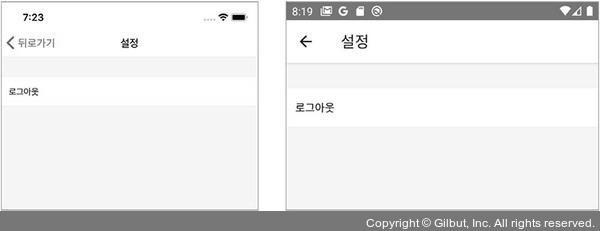
이제 SettingScreen을 구현해봅시다. 이 컴포넌트에는 로그아웃 버튼만 만들어주면 됩니다.
screens/SettingScreen.js
import React from 'react'; import {StyleSheet, View, Text, Pressable, Platform} from 'react-native'; import {useUserContext} from '../contexts/UserContext'; import {signOut} from '../lib/auth'; function () { const {setUser} = useUserContext(); const onLogout = async () => { await signOut(); setUser(null); }; return ( <View style={styles.block}> <Pressable onPress={onLogout} style={({pressed}) => [ styles.item, pressed && Platform.select({ios: {opacity: 0.5}}), ]} android_ripple={{ color: '#eee', }}> <Text>로그아웃</Text> </Pressable> </View> ); } const styles StyleSheet.({ block: { flex: 1, paddingTop: 32, }, item: { borderTopWidth: 1, borderBottomWidth: 1, borderColor: '#eeeeee', backgroundColor: 'white', paddingVertical: 16, paddingHorizontal: 12, }, itemText: { fontSize: 16, }, }); export default SettingScreen;
컴포넌트를 작성한 후 설정 화면을 열어보세요. 다음과 같이 잘 나타났다면 로그아웃을 눌러보세요.

▲ 그림 9-24 설정 화면
이것으로 PublicGallery 앱의 모든 기능을 구현 완료했습니다!